Clip in hair extensions: Transform thinning hair into voluminous strands in 10 minutes! They work on all hair types for natural-looking results – and they’re reusable. Below, you’ll find a guide on putting clip in hair extensions, including step-by-step instructions for how to install them.
Table of Contents
Preparing for putting clip in hair extensions
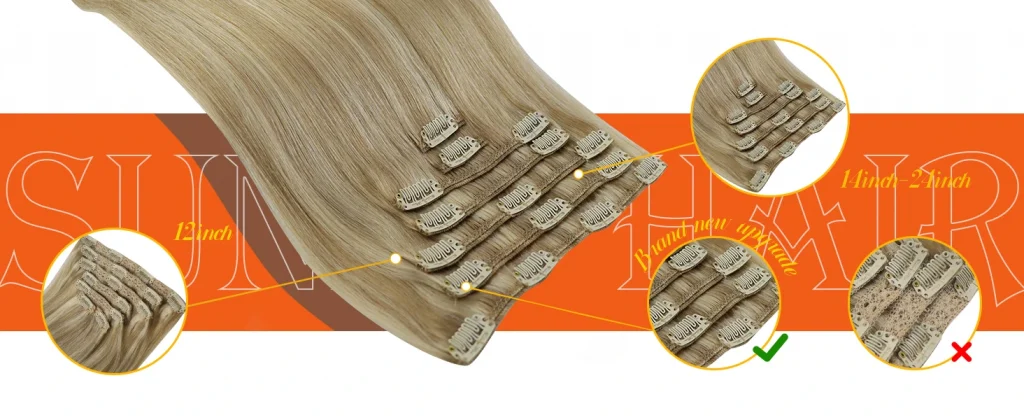
Tools Needed for Putting Hair Extensions
| Item | Purpose | Recommended Product |
|---|---|---|
| Wide tooth comb | Prevents tugging and knotting. | / |
| Sectioning | Prepare for clip in extensions how to install | Sunny Alligator Clips for Hair Styling |
| Conditioner Detangler Spray | Leaves hair effortlessly smooth and easy to comb. | Sunny Hair Conditioner Spray |
Hair Type Customization
- Fine hair: Spray dry shampoo spray on roots for extra support.
- Coarse hair: Pre-clamp with straightening irons for flat hair regrowth.
Step-by-Step Guide to Putting Clip In Extensions
Step 1: Section Your Hair
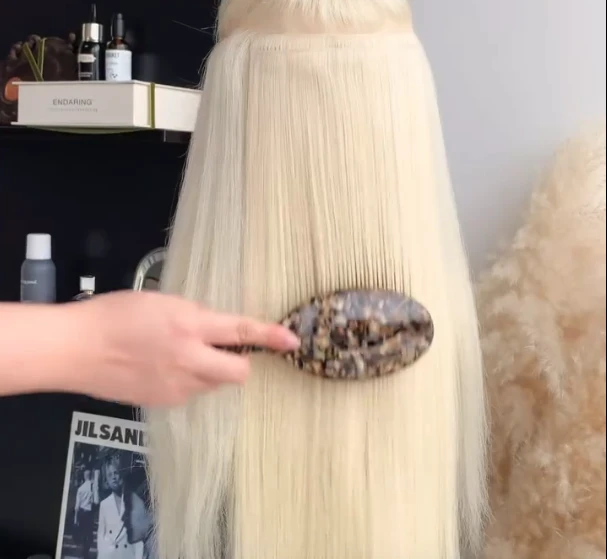
Start by brushing your hair thoroughly to remove knots and tangles. This creates a smooth base for your extensions. Then, section off the part where you want to place the first clip-in piece.
Pro tip: Use a tail comb for precise sectioning!
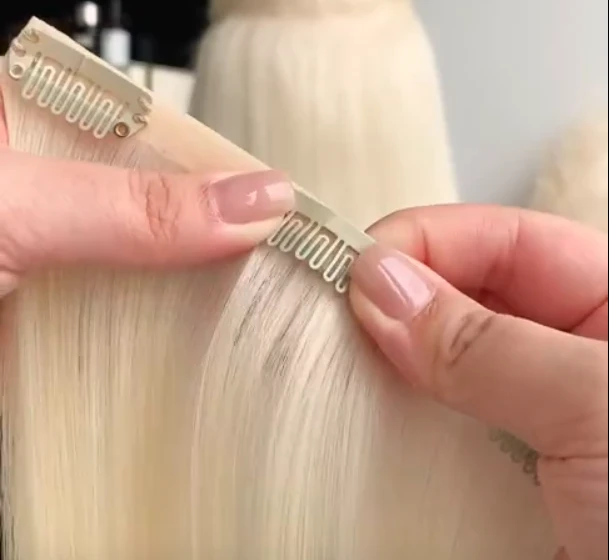
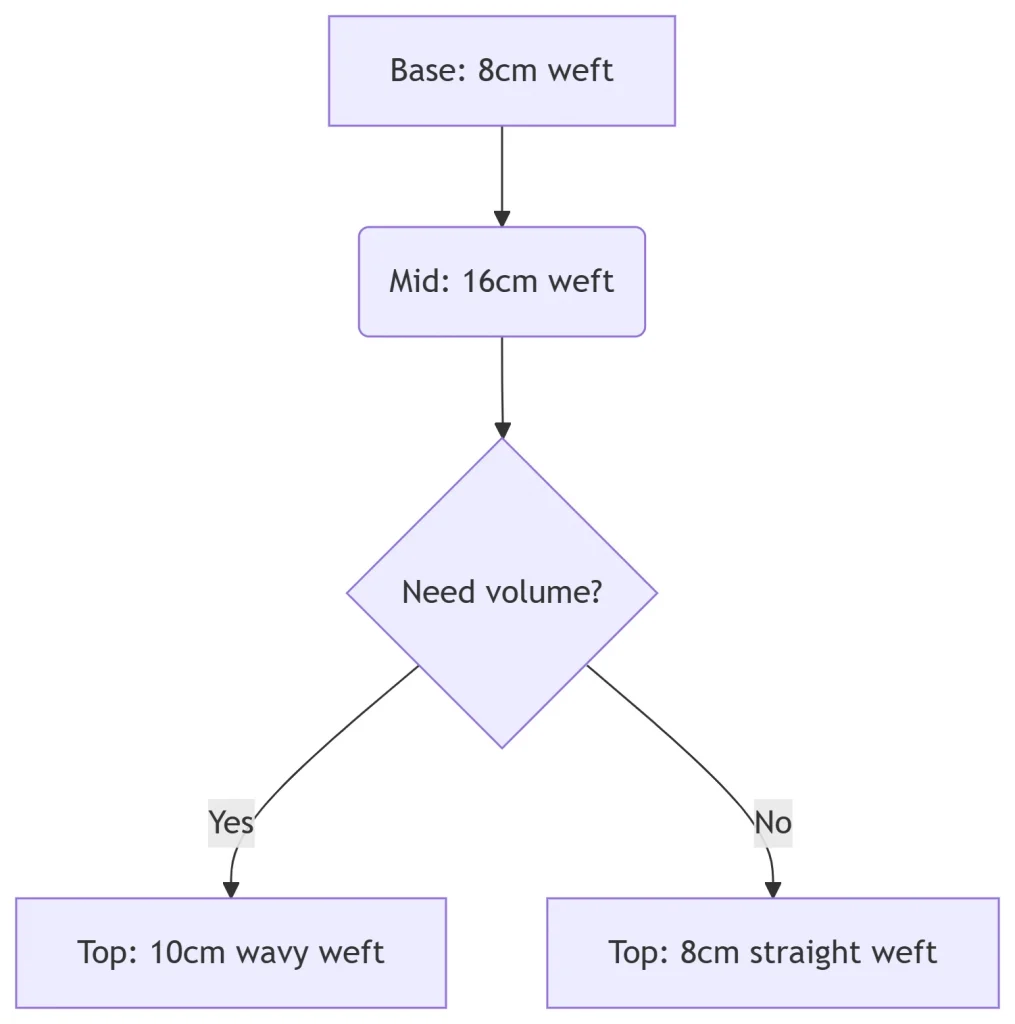
Step 2: Attach the Base Layer
Grab your clip-in extension and open the clips (usually 1-4 per weft). Make sure they’re fully open and ready to secure.
(Safety Note: Metal clips may cause allergies, so be cautious if you have sensitive skin. Keep clips away from kids and pets.)
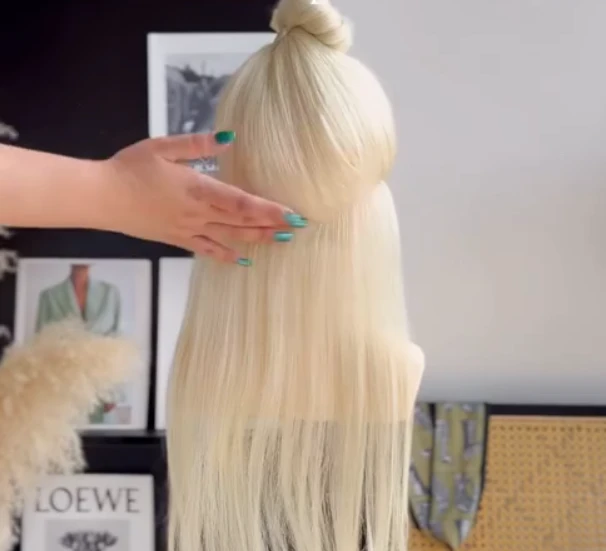
Step 3: Blend with Mid-Layer
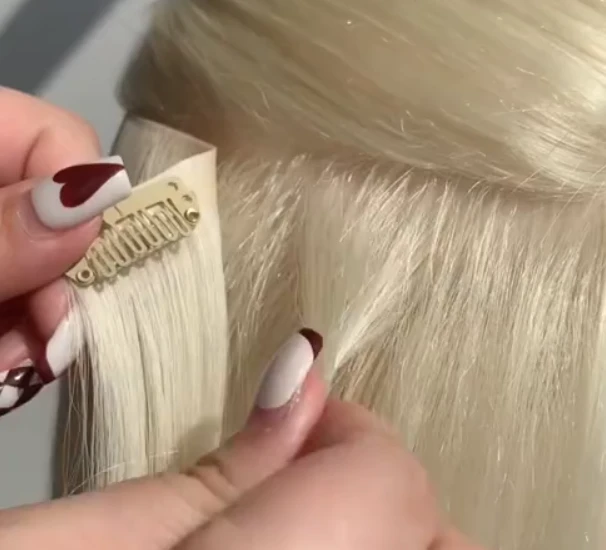
Place the extension under the sectioned hair and press the clips firmly into your natural hair. Start from the center and work outward—you’ll hear a satisfying click when they’re secure.
Step 4: Final Styling & Locking
Repeat the process, moving to the next section of your hair. Blend each piece with your natural hair for a flawless look. Keep layering until you achieve your desired volume and length.
Advanced Tips
- Multi-level blending formula
- Durability Improvement Program
Rainy Day: Use Conditioner Detangler Spray to form a moisture-proof film.
Nighttime Maintenance:
① Reverse the head comb to remove the hair piece.
② Smooth the hair with a brush.
FAQs
Putting Clip In Hair Extensions: Video
Visual Guide to Putting Clip In Extensions
That’s all there is to putting clip in hair extensions. With these simple steps, you’ll be turning heads in no time.
Interested in clip-in hair extensions? Click here:
Related Sharing: How to Remove Clip in Hair Extensions?
Still need help?
We are here for you!
If you have any other questions or concerns about putting clip in hair extensions, please feel free to contact us anytime. Our dedicated after-sales team is ready to provide you with the best service! 😊
how to put in clip in extensions
how to apply clip in hair extensions,how to put in clip in hair extensions,how do you put in clip in hair extensions,how to place clip in extensions,how do i put in clip in hair extensions,how do you put clip in extensions in,how do you put clip in hair extensions,how do you put clip in hair extensions in,how do you put clip on hair extensions in,how do you put clips on hair extensions,how do you put in clip hair extensions,
how do you put in clip in extensions
how do you put in clip on hair extensions,how do you use clip in hair extensions,how to apply clip in extensions,how to insert clip in hair extensions,how to put clip extensions in,how to put clip extensions in hair,how to put clip hair extensions in,how to put clip on extensions in,how to put clip on hair extensions in,how to put clips in extensions,how to put hair clip extensions,how to put hair clip extensions in,
how to put hair clips on extensions
how to put in clip in extension,how to put in hair clip in extensions,how to put it clip in hair extensions,how to put on clip extensions,how to put on extensions with clips,how to put on hair extension clips,putting clip in hair extensions,how to install clip in hair extensions,where to place clip in extensions,best way to put clip in hair extensions,best way to put in clip in extensions,clips to put on hair extensions,
how to install hair clip extensions
how to put a clip in your hair,how to put a hair clip in,how to put a hair clip in your hair,how to put clip in bangs,how to put clip in hair,how to put clip in your hair,how to put clip on bangs,how to put clip on hair,how to put hair clip in,how to put hair clip in your hair,how to put hair extensions in without clips,how to put in a clip in fringe,how to put in clip in bangs,how to put in clip in fringe,how to put in clip on bangs,
how to put in hair extensions without clips
how to put on a clip on bang,how to put on clip in bangs,how to put on hair clip,placing clip in hair extensions,putting in hair clip extensions,putting on clip in hair extensions
Love these, nice hair
Thank you for your support to Sunny. ❤ If you have any questions, please message us and we will help you as much as we can.