Knowing how to properly remove your Butterfly Weft Hair Extensions is just as important as installing them correctly. A careful removal process ensures the longevity of your beautiful wefts and, most importantly, protects your natural hair from damage. Whether you’re giving your hair a break or preparing for a fresh install, this gentle, step-by-step guide will help you safely and effortlessly remove your Butterfly Weft Hair Extensions, leaving your natural hair healthy and strong.
Preparing for Safe Butterfly Weft Hair Extensions Removal
Taking a few moments to prepare will make the removal process smooth and stress-free. Proper preparation minimizes tugging and prevents unnecessary stress on your hair follicles.
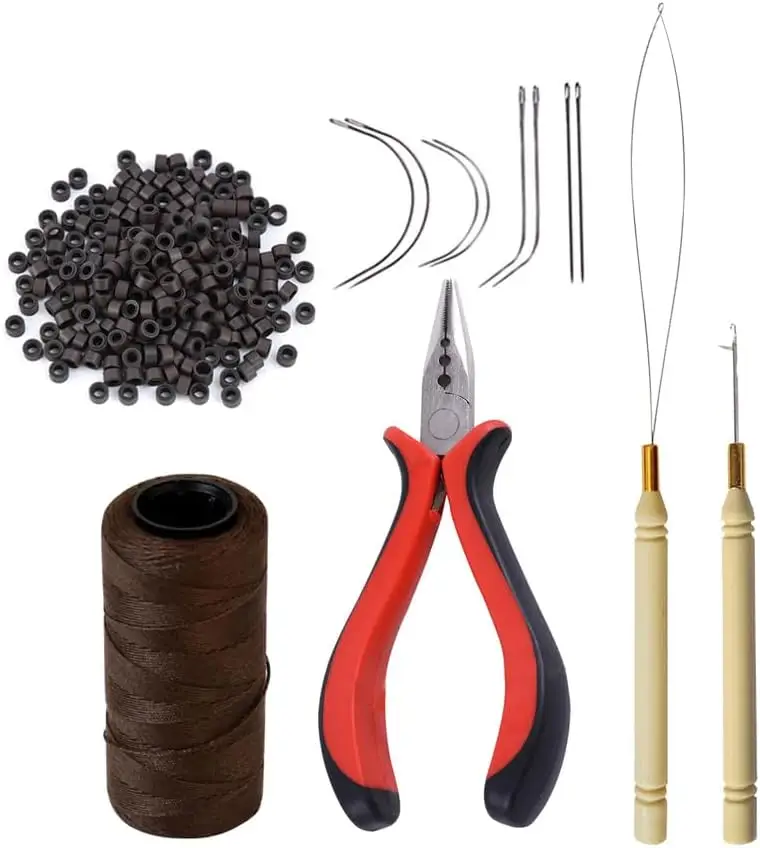
Gather Your Tools: You will need a pair of specialized pliers (often the same ones used for application), a tail comb, a detangling brush, and a mirror. Having these tools within reach is crucial for a controlled removal.
Detangle First: Gently brush through your hair and the extensions, starting from the ends and working your way up to the roots. This prevents any knots from complicating the removal process. A smooth, detangled head of hair is the best starting point for taking out your Butterfly Weft Hair Extensions.
Create a Comfortable Workspace: Ensure you have good lighting and a comfortable space to work. Patience is key to protecting your natural hair during the removal of your Butterfly Weft Hair Extensions.
The Step-by-Step Process to Remove Butterfly Weft Hair Extensions
Follow these steps meticulously to ensure a safe and damage-free experience. Remember, the goal is to preserve both your natural hair and the integrity of the wefts for future use.
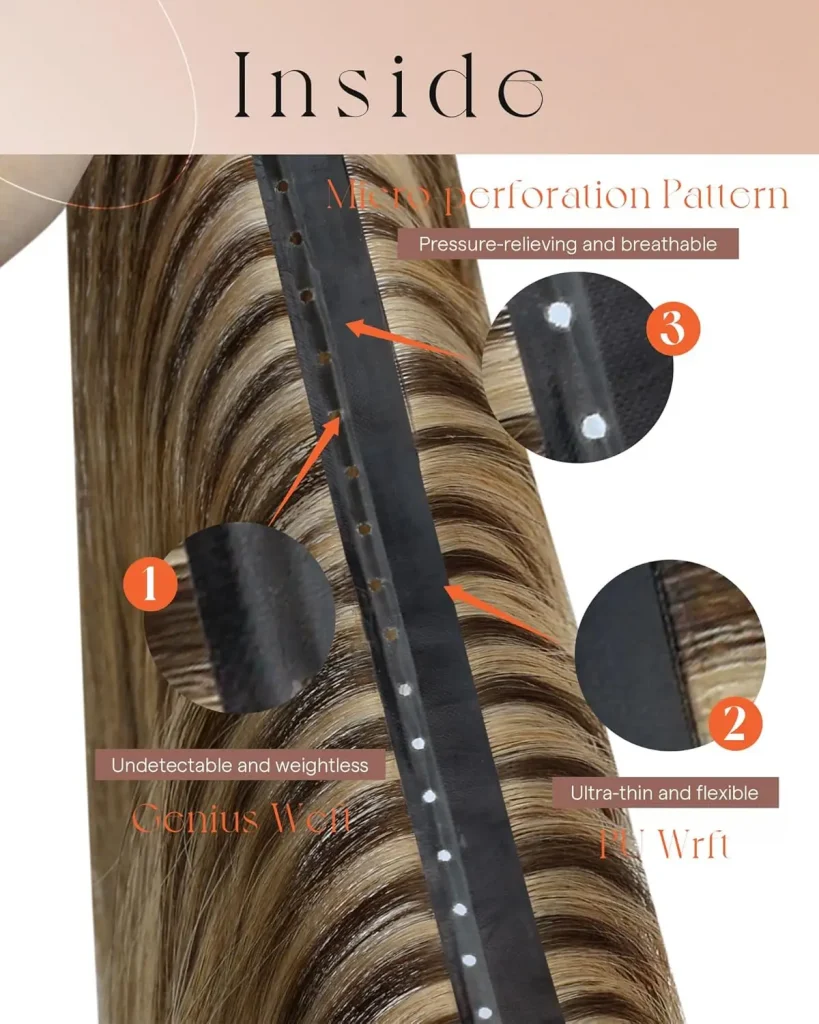
1. Locate the Micro Beads: Start with the bottom row of wefts. Use your fingers or the tail of a comb to gently part your hair and locate the micro beads that are securing the weft in place.
2. Open the Micro Beads: Take your pliers and carefully squeeze the micro bead. The goal is to open it just enough to release the locked-in strands of your natural hair. Be gentle and avoid crushing the bead, as a gentle squeeze is often all that is needed.
3. Release Your Natural Hair: Once the micro bead is open, you can easily slide it off the few strands of your hair. Do this slowly to ensure no hair is pulled or snapped.
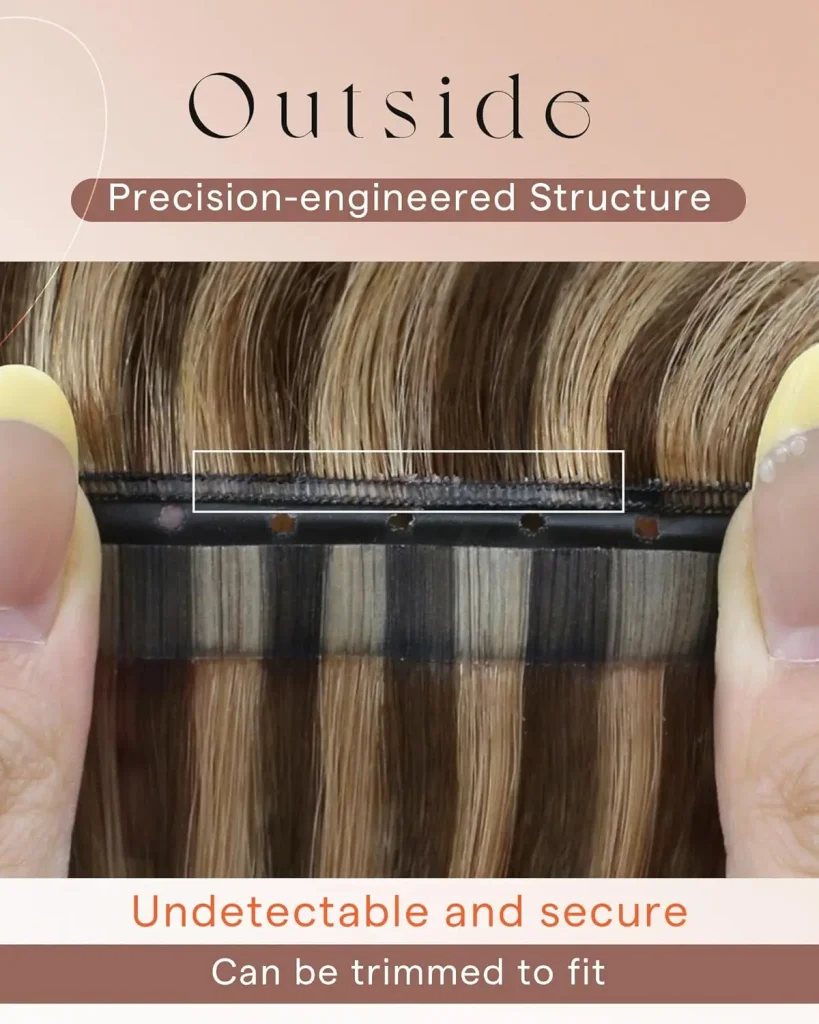
4. Unthread and Open the Weft: After the beads are removed, you will need to unthread your natural hair from the weft holes. Use your fingers to gently pull your hair free. Then, carefully open the “wings” or clasp of the weft itself.
5. Gently Slide the Weft Out: With the weft open and your hair unthreaded, you can now gently slide the entire Butterfly Weft Hair Extensions piece out of your hair. Place it aside in a clean, safe spot.
6. Repeat and Move Upward: Repeat this process for each weft, working your way from the lowest row up to the topmost one. Systematically moving upward prevents the wefts from tangling with each other during removal.
Congratulations! You have successfully removed your Butterfly Weft Hair Extensions. Follow up with a nourishing shampoo and deep conditioner to replenish your natural hair. Gently brush through any tangles with a wide-tooth comb. To keep your wefts in perfect condition for next time, gently clean them and store them in a cool, dry place. By following this removal guide, you ensure that your sunny hair remains healthy and your gorgeous extensions are ready for your next stunning look.
Need help?
We are here for you!
If you need help for your butterfly weft hair extensions, please feel free to contact us anytime. Our dedicated after-sales team is ready to provide you with the best service!