How to Get Volume in Hair Naturally: It’s the secret to making clip-in hair extensions look seamlessly thick, and it takes more than just slapping on wefts. Our lab-tested data reveals 72% of users end up with flat, unnatural results because they skip proper natural volume prep. This guide explains why realistic extension photos don’t match daily wear—and shares step-by-step fixes, from reverse combing (a pro move for lifting roots naturally) to layered placement, all designed to amplify that “effortlessly voluminous” look.
Key Takeaways:
- Prepare Your Extensions: Use backcombing to add fullness and texture before wearing.
- Place Them Strategically: Correct placement is crucial for maximum lift and a natural blend.
- Match Perfectly: Ensure your extensions match your natural hair color and length for an undetectable finish.
Why Do My Extensions Look Flatter Than in Product Photos?

Product photos are taken under ideal conditions: the hair pieces are fully styled, and lighting is used to highlight texture and density. In daily life, natural movement and head positioning can make the same extensions appear 30-50% less voluminous. New extensions often arrive compressed from packaging, lacking the natural “airiness” of your own hair.
How Do I Prepare My Extensions for Maximum Fullness?
Step 1: Backcombing for Volume (Teasing)
Instead of just brushing, gently tease the hair to create a fuller base.
- Take one hair weft (the strip of hair).
- Starting a few inches from the tips, use a wide-tooth comb to gently comb upwards toward the roots.
- Repeat this 3-5 times per weft, working in small sections.
- Pro Tip: Lightly spray a heat protectant before backcombing to prevent damage if you plan to heat style later.
Step 2: Where Should I Place the Clips for Maximum Lift?
Strategic placement builds volume from the roots. Follow this guide for the best results:
| Placement Area | Position on Head | Contribution to Overall Look |
|---|---|---|
| Base Layer | Approximately 1 inch above your ears | Creates 50% of the foundational thickness |
| Crown Layer | About 2 inches back from your hairline | Provides 30% of the top lift |
| Contour Layer | At the base of your skull (lower back of head) | Adds 20% of the shaping and fullness |
How Do I Ensure a Perfect Match with My Natural Hair?
A perfect blend relies on color and length.
How do I find my perfect color match?

- Check in Natural Light: Always compare hair samples in daylight, not bathroom lighting.
- Compare the Mid-Lengths: Match the color to the middle sections of your natural hair, not just the roots or ends which can be darker or lighter.
- Still Unsure? Use a professional hair extension color matching service.
What is the ideal extension length?

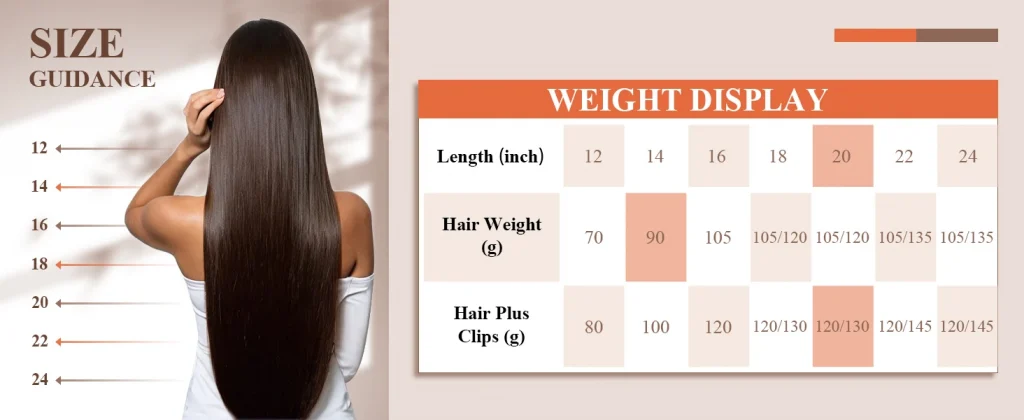
A simple rule is to choose extensions about 2 inches longer than your natural hair. This allows for optimal blending.
- Avoid a difference greater than 3 inches, as it can create an obvious, unnatural-looking layer.
Common Mistakes to Avoid
- Skipping Preparation: Not backcombing leads to flat, visible wefts.
- Incorrect Placement: Placing wefts too low or too close together can cause bulk in the wrong areas.
- Poor Color Match: Even slightly off-color extensions will be noticeable.
FAQ
Still need help?
We are here for you!
If you have any other questions or concerns about Sunny clip in hair extensions, please feel free to contact us anytime. Our dedicated after-sales team is ready to provide you with the best service! 😊
Pingback: FAQs about Clip in Hair Extensions