Summary:This comprehensive guide covers professional weft hair extension installation techniques. Whether you’re an experienced user, an advanced DIY enthusiast, or a stylist, you can choose the installation method that matches your hair density, lifestyle, and desired wear duration for a flawless look.
Key Takeaways
- Four primary methods exist: Sew-in, Glue-in, Clip-in, and Microbead.
- Each technique varies in difficulty, durability, and impact on natural hair.
- Proper preparation and aftercare are essential for longevity and hair health.
- Selecting the right tools is crucial for successful extension attachment.
Preparation for Weft Hair Extension Installation
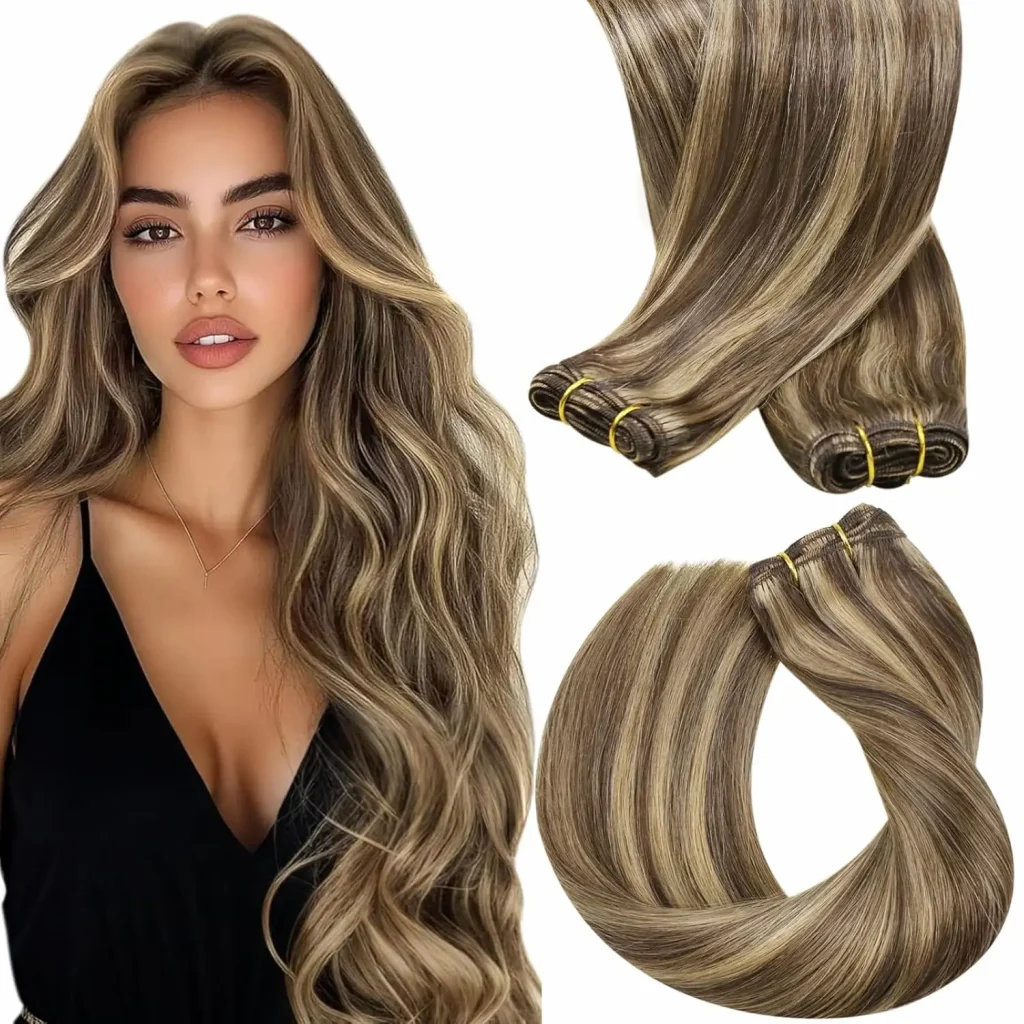
Before starting any weft hair extension installation, proper setup is key. A weft is a collection of hair strands sewn onto a thin, flexible fabric strip, forming the base of most hair bundles or weaves.
Tools for Perfect Weft Installation
| Purpose | Why You Need It | Recommended Product | Recommended Product |
|---|---|---|---|
| Prevents tugging and knotting. | To detangle hair before and during the process. | Prevents tugging, breakage, and knotting in both natural hair and extensions. | |
| Securely holds your hair in place. | To securely hold hair sections in place | Allows for neat, organized parts and provides a stable working area. | Sunny Alligator Clips for Hair Styling |
| Leaves hair effortlessly smooth and easy to comb. | To soften hair and reduce friction. | Leaves hair effortlessly smooth, manageable, and easy to comb through. | Sunny Hair Conditioner Spray |
| C-Curved Needle (for Sew-in) | To sew the weft onto braids. | Its curved design allows for safe, easy stitching close to the scalp. | Professional Weaving Needle |
Top 4 Methods For Installing Hair Wefts
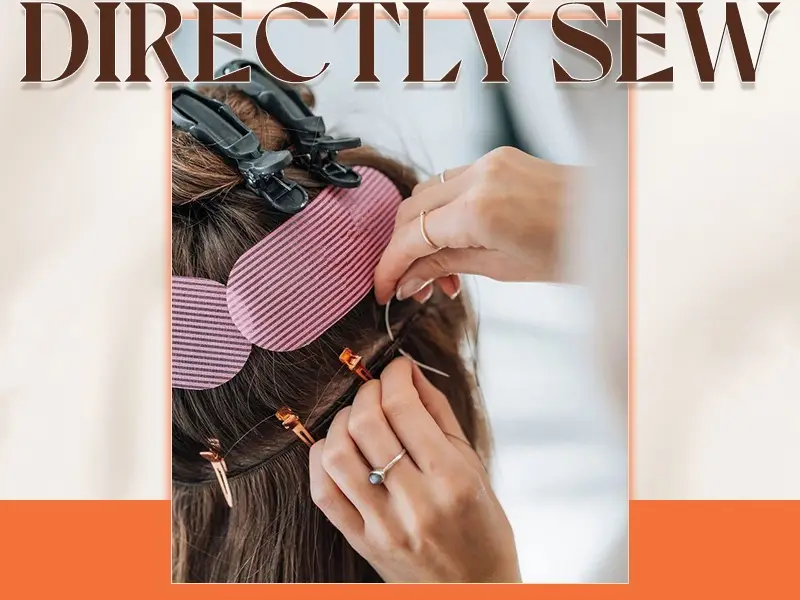
Directly Sew in Weft Hair Extensions
This technique involves sewing the weft onto a tight cornrow (a flat braid very close to the scalp) for superior stability. It’s ideal for a secure, durable fit that offers a natural-looking blend with your own hair. Best for thick hair that can handle the weight of braids.
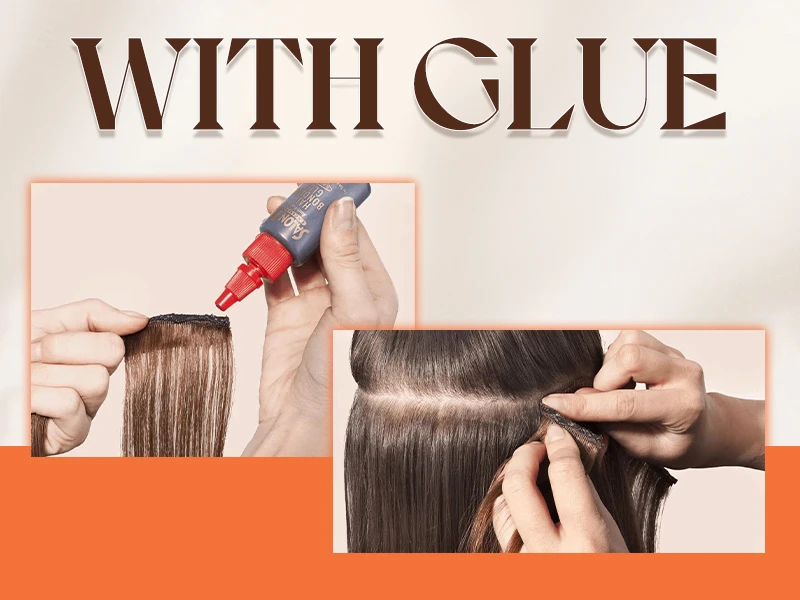
Directly Glue in Weft Hair Extensions
Apply a special adhesive directly to the weft and scalp or a hair part. This offers a quick application for temporary wear (e.g., a few days to a week) without sewing.
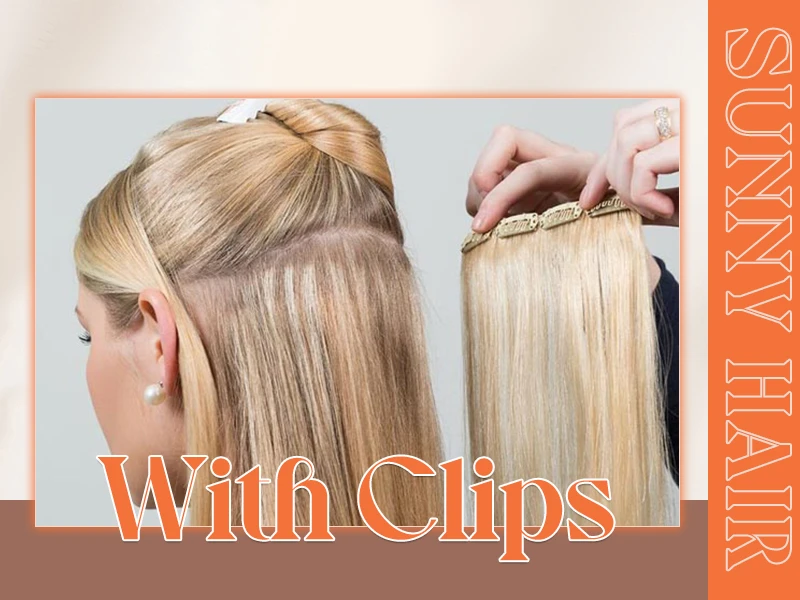
Add Clips to The Hair Wefts
Small, secure clips are sewn onto the top of the weft. These wefts simply snap open and closed onto sections of your natural hair. This method is perfect for immediate length and volume, is non-damaging, and can be removed nightly.
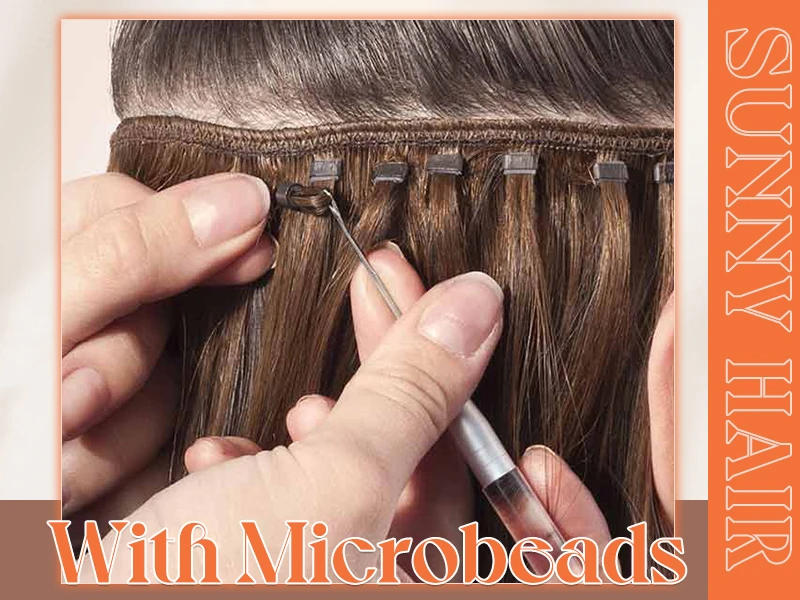
Add Microbeads to The Hair Wefts
Tiny, cylindrical beads are used to loop and clamp small sections of the weft and your natural hair together. This lightweight and reusable method doesn’t require heat, glue, or braiding, making it a great damage-free choice, especially for fine hair.
Comparison: Choosing Your Installation Method
| Method | Difficulty | Best For Hair Type | Wear Duration | Key Benefit |
| Sew-In | Professional | Thick, dense hair | 6-8 weeks | Maximum security & seamless look |
| Glue-In | Intermediate | Most types (patch test first) | 1-2 weeks | Quick, temporary transformation |
| Clip-In | Beginner | All types | Daily wear | Instant, damage-free volume |
| Microbeads | Intermediate | Fine to medium hair | 4-6 weeks | Reusable & minimal stress on hair |
FAQ
Video: weft hair extension installation
This is a video about weft hair extension installation.
Interested in weft hair extensions? Click here:
Related Sharing: How to care for weft hair extensions?
Still need help?
We are here for you!
If you have any other questions or concerns about Sunny weft hair extension installation, please feel free to contact us anytime. Our dedicated after-sales team is ready to provide you with the best service! 😊